Top 10 Free Bootstrap Admin Templates in 2018

We are already in 3rd month of the year 2018. Here, we would like to share with you our top 10 free Bootstrap admin templates for this year. Enjoy!

What is Bootstrap?

Bootstrap is a free front-end framework for faster and easier web development. Bootstrap includes HTML and CSS based design templates for typography, forms, buttons, tables, navigation, modals, image carousels and many other, as well as optional JavaScript plugins.

Free Admin Templates

Here are some amazing free templates that will make your admin dashboards look clean and sophisticated.

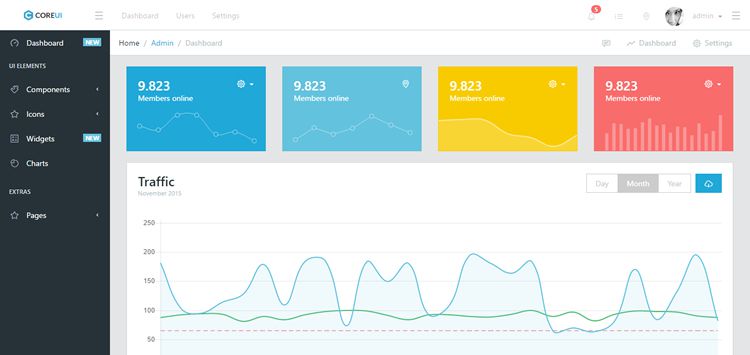
CoreUI Free Bootstrap 4 Admin Template

Download Core UI

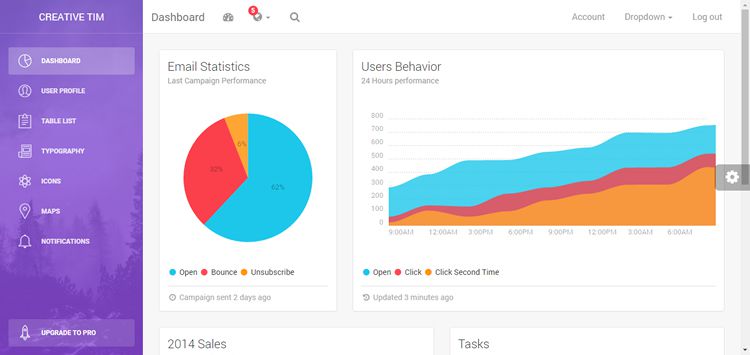
Light Bootstrap Dashboard

Download Light Bootstrap

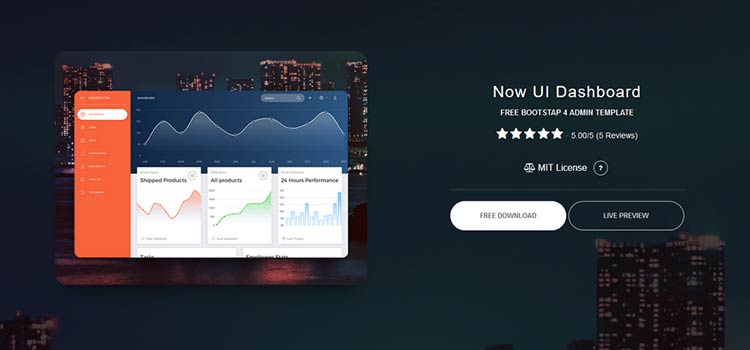
Now UI Bootstrap Dashboard

Download Now UI Dashboard

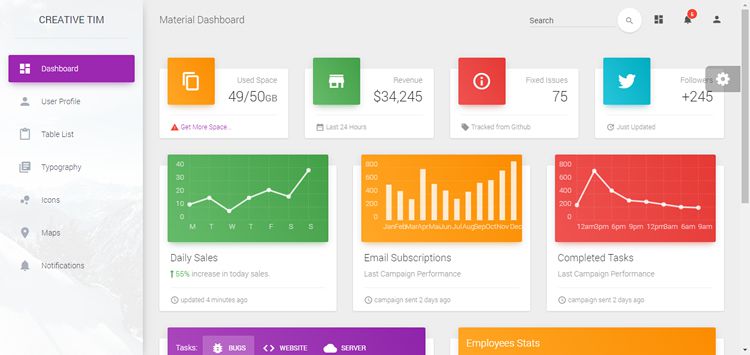
Material Dashboard – Bootstrap Material Design Admin

Download Material Dashboard

Laravel Admin Bootstrap Template

Download Laravel Admin Bootstrap

Material Design for Bootstrap 4

Download Material Design for Bootstrap 4

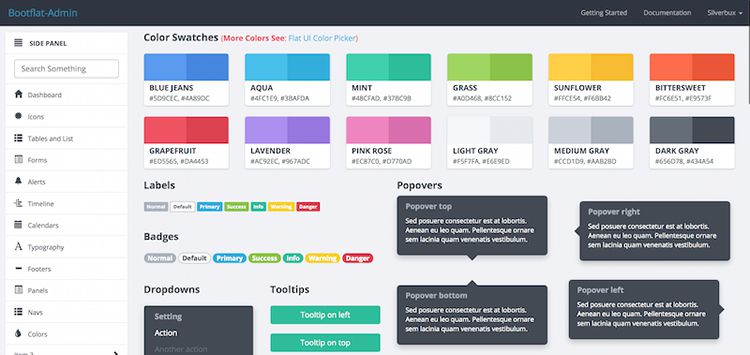
BootFlat Open-Source Admin Dashboard Flat UI Kit

Download BootFlat

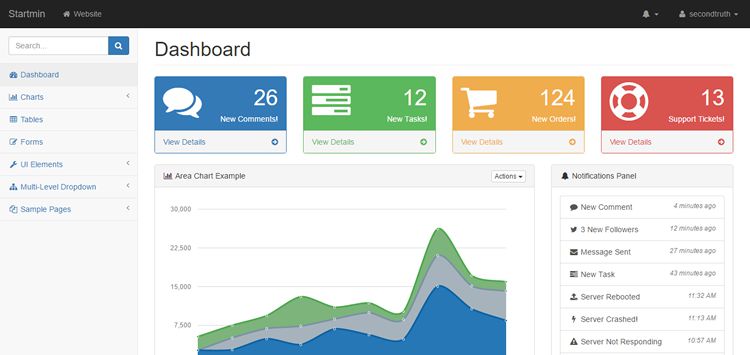
Startmin Admin Dashboard Template

Download Startmin

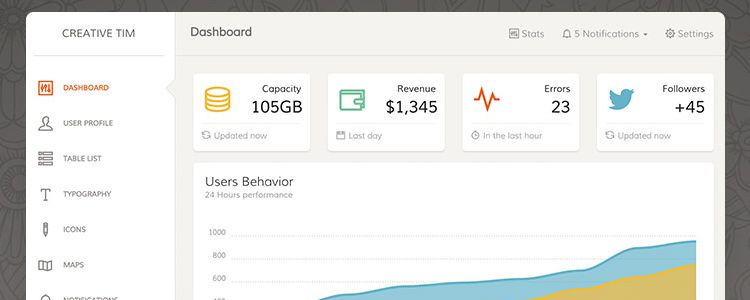
Paper Dashboard Bootstrap Admin Template

Download Paper Dashboard

Blocks – A Single-Page Widgetised Admin Template

Download Blocks

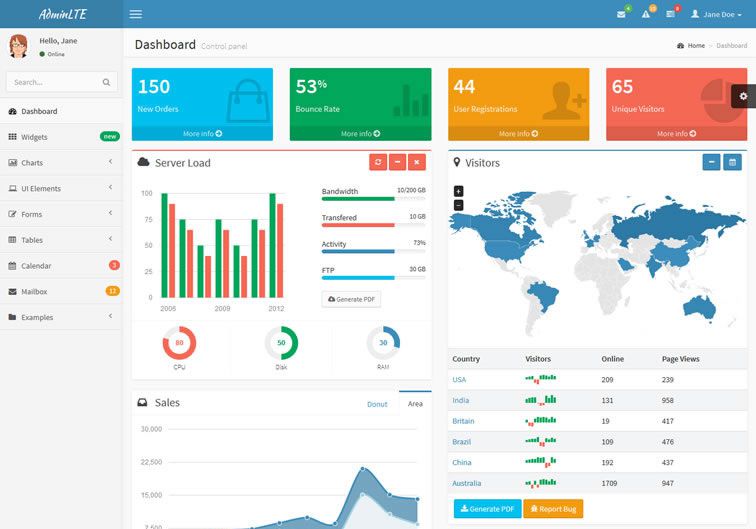
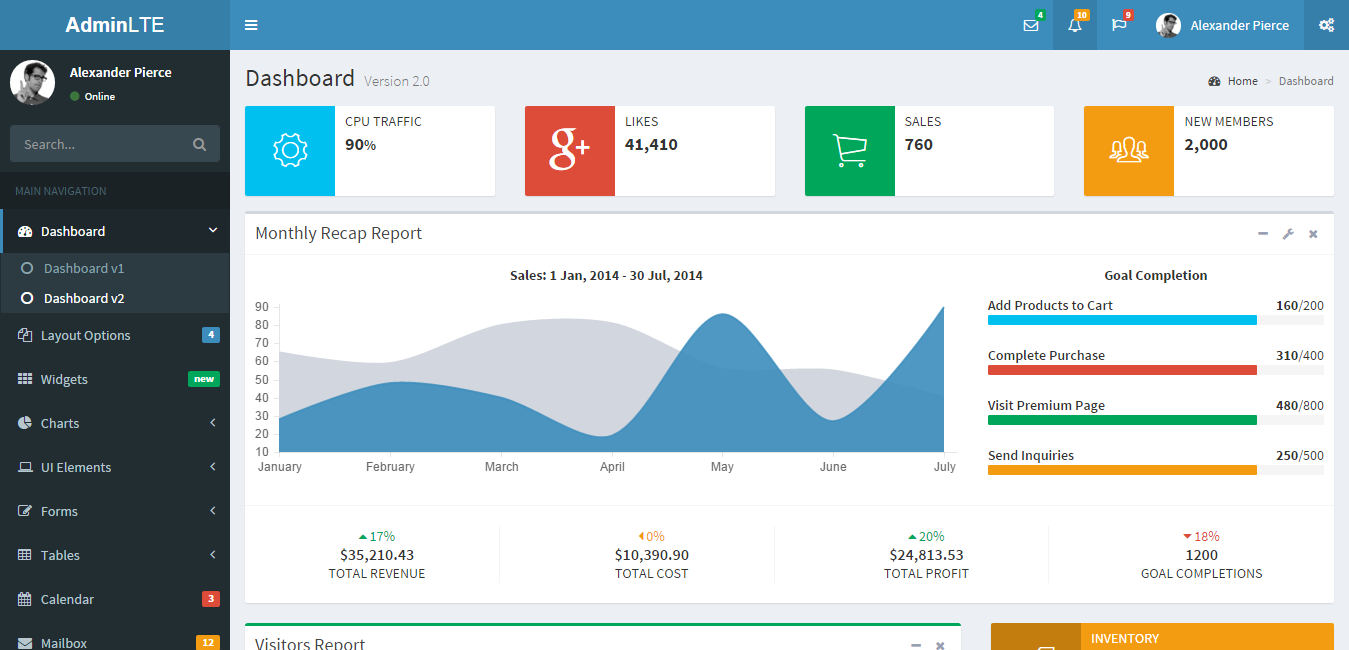
AdminLTE – A Clean Admin Theme

Download AdminLTE

Use SMTP Email Settings from Database in CakePHP 2

Yesterday, one of our client requested to store SMTP email settings in database. Usually, we can do it in the email.php file. However, it is more convenient if we store it in the database and provide a web form to easily change it.

Let say we store the email settings in table called email_settings with model EmailSetting.

One of the way is to retrieve the email settings record in every email sending method you have as per below:

 // get email settings
$EmailSetting = ClassRegistry::init('EmailSetting');
$email_settings = $EmailSetting->findById(1);
$email_setting = $email_settings['EmailSetting'];

and load the SMTP email settings as per below:

if (!empty($email_setting['smtp_host'])) {
 $email->config(array(
    'host' => $email_setting['smtp_host'],
    'port' => $email_setting['smtp_port'],
    'username' => $email_setting['smtp_user'],
    'password' => $email_setting['smtp_password'],
 ));
}

But that way will not promote a code use. After digging CakePHP cookbook, we found out that we can retrieve the email settings in the EmailConfig class (in file /app/Config/email.php). You can just load the SMTP email settings in __construct() function. It’s very convenient and you can easily change it whenever needed.

Here’s the codes:

File:  /app/Config/email.php

class EmailConfig
{
  public function __construct()
  {
      $EmailSetting = ClassRegistry::init('EmailSetting');
      $email_settings = $EmailSetting->findById(1);
      $email_setting = $email_settings['EmailSetting'];

      if (!empty($email_setting['smtp_host'])) {
         $this->default = array(
             'transport' => 'Smtp',
             'from' => $email_setting['from'],
             'host' => $email_setting['smtp_host'],
             'port' => $email_setting['smtp_port'],
             'timeout' => 30,
             'username' => $email_setting['smtp_user'],
             'password' => $email_setting['smtp_password'],
             'client' => null
          );
      }
  }
}

Enjoy!

CakePHP Plugin: Summernote

We came across the need to have a CakePHP plugin for Summernote. For those you haven’t heard about it, Summernote is a WYSIWYG HTML editor which enable user to insert HTML tags in a textarea input. You can try the demo here: http://summernote.org

Summernote

To quickly use it in your CakePHP project, you can try my plugin here:

https://github.com/zhaff/CakePHP-Summernote

We appreciate any feedback.

Enjoy!

5 Free Bootstrap Admin Template for Your Project

If you developed a web based system like an Inventory system, a Booking system or an Accounting system, these 5 admin templates can save you a lot time developing your own admin template.

These templates is based on Bootstrap framework. You can use it in both commercial and non-commercial project.

Enjoy!

Admin LTE

AdminLTE-2-Dashboard

Link: https://almsaeedstudio.com/

SB Admin 2

SB-Admin-2-Bootstrap-Admin-Theme

Link: http://startbootstrap.com/template-overviews/sb-admin-2/

SB Admin

SB-Admin-Bootstrap-Admin-Template

Link: http://startbootstrap.com/template-overviews/sb-admin/

DashGum

DASHGUM-FREE-Bootstrap-Admin-Template

Link: http://blacktie.co/2014/07/dashgum-free-dashboard/

Gentallela

Gentallela

Link: https://github.com/kimlabs/gentelella

5 Latest Tools to Build Your Website – Fast & Easy

As Web Developer or Web Designer, using a good tools to quickly develop website for your client is a winning strategy.

Here, I list out 5 latest tools you can use to develop your websites:

1.  Pingendo

pingendo

Pricing: Free

2. Pinegrow

pinegrow

Pricing: From $49

3. Bootstrap Studio

bootstrap-studio

Pricing: From $50

4. Jetstrap

jetstrap

Pricing: From $16 per month

5. Brix.io

brix.io_

Pricing: From $4.90 per month

You’re now equipped with 5 latest editors for quickly developing your websites.

If you’re currently using one of these editors, or if we left one off the list, let us know in the comments below.

How to Setup Your Local Web Server – Fast & Easy

There are many package available out there to setup your local web server like XAMPP, WAMP and EasyPHP. All you need in the package is Apache, PHP 5.4 or latest, MySQL database and PhpMyAdmin. Remeber to have an internet connection, and you can find a broadband deal comparison</ at that link to help you!

Here, we show you how to setup your local web server using XAMPP on Window.

  1. Download the latest XAMPP for Window at https://www.apachefriends.org/index.html
  2. XAMPP websiteStart the installation process by double-clicking on the XAMPP installer. Click ‘Next’ after the splash screen.step2
  3. Here, you can select the components you want to install. Choose the default selection and click ‘Next’.

    step3

  4. Choose the folder you want to install XAMPP in. This folder will hold all your web application files, so make sure to select a drive that has plenty of space.

    step4

  5. The next screen is a promo for BitNami, an app store for server software. Deselect the ‘Learn more about BitNami for XAMPP’ checkbox, unless you actually enjoy receiving promo mails!

    step5

  6. Setup is now ready to install XAMPP. Click Next and wait for the installer to unpack and install selected components. This may take a few minutes. You may be asked to approve Firewall access to certain components (such as Apache) during the installation process.step7
  7. Installation is now complete! Select the ‘Do you want to start the Control Panel now?’ checkbox to open the XAMPP control panel.step8

Testing Your XAMPP Installation

Follow these steps to test your XAMPP installation by launching the Apache web server and creating a simple PHP file.

  1. In the XAMPP control panel, click on ‘Start’ under ‘Actions’ for the Apache and MySQL module. This instructs XAMPP to start the Apache webserver and MySQL database.step9
  2. Open your web browser and type in: http://localhost or http://127.0.0.1
  3. You should see the following screen. This means you’ve successfully installed XAMPP on your computer.step10
  4. We will now test whether XAMPP has installed PHP successfully. To do this, fire up Notepad and type the following into a new document:<?php
    echo ‘Hello world’;
    ?>
  5. Save this file as ‘test.php’ in c:\xampp\htdocs\ (or whichever directory you installed XAMPP in)
  6. Navigate to localhost/test.php. You should see the “Hello World” message:

Congratulations! You have now successfully installed XAMPP on your PC. You can now use your local Apache webserver to install our scripts. Always remember that it needs to be maintained and customer centric focus will help you improve. Check out Salesforce for a CRM that will help you maintain it.

Enjoy!

How to Create a Change Log for Your Product

At neptuneScripts.com, we will require to create a nice change log file which is readable to our customers each time a project released. It will become cumbersome if there are a lot of log files to create. Since all our projects used Git as source code repository, generating a change log from the Git history will help us cut down our time a lot.

Here are the git command we used to generate the change log files:

$ git log –since=”2015-09-01″ –name-only –date=short –pretty=”%nDate: %cd%nCommit ID: %h%nDescription: %s%n%nAffected files:” > Recent_Changes.txt

This command will generate a nice change log file (changelog.txt) like the above screenshot. You may adjust
“–since=” as per your commits date.

Enjoy!

Welcome

Thank you for visiting our blog. This blog will become our platform for us to share our tips, tutorials, articles etc to you. We hope that it will add value to your work, business and life.

Stay tunes for more updates. Sharing is caring.

Thank you for supporting us.

Hand holding a stone heart on the beach. Symbol of life.